Showing posts with label gift ideas. Show all posts

4.11.2011

Top Note Totes


I made these cute little totes with the Top Note die! I cute the top note in half and adhered it to the front and back of some little boxes. For the boxes, I started with a 5-1/2" x 7" piece of cardstock and scored at 2" & 3-1/2" on the 5-1/2" side and 2" & 5" on the 7" side. I cut along the score lines on opposite sides and put the box together. I added a 1/2" x 8-1/2" handle to each box.

I used the new sneak peak Four Frames stamp set that is available this month with any $20 order. Sneak Peek alert: I added the flower punched out with the new Blossom Bouquet Triple Layer Punch from the upcoming Summer Mini Catalog. This new punch will punch out three different images! I'm having lots of fun punching out the different images from one punch!

Here is a list of the supplies that I used!  Place an order and you will receive a free surprise gift from me!


Click here to Order Stampin' Up! Online Anytime!!

1.25.2010

Friend Basket & Valentine's Stamp Party

I made this friend basket with the Baskets & Blooms Sizzix die. I cut out the two sides and then added a 3" x 8-1/2" piece of cardstock in the middle. I scored it at 2-3/4" and curved the bottom piece to follow the curve of the basket. I then scored 1/2" along the length of each side and used it as tabs to adhere to the side pieces. I cut the middle tab into three tabs so I could mimic the curve of the bottom of the basket.

I added some flowers from the Birds & Blooms 4-pack of Sizzlit dies and a red corduroy button in the middle. I stamped "Friend" from the With all my Heart stamp set and punched it out with the large oval punch and layered it on the scallop oval.

I used the Sending Love Specialty DSP for the middle piece and the scalloped circle handle.
To create the scallop circle I punched a 1-1/4" circle and then punched the scallop circle on top of it. To create the handle I punched over the original handle with the 1-1/4" circle punch and then added the scallop circle.


If you live in the area, I'm having a Valentine's Stamp Party this Thursday night at 7pm at my house! We will be making three cute Valentine's projects just in time for Valentines Day! There is a $10 fee, but if you make a $50 purchase you'll not only receive a free Sale-a-bration item, but also the fee will be waived!

There will be a door prizes, free gifts for bringing a friend and lots of fun samples to see!

Space is limited, so please RSVP (email me) by Tuesday, January 26th.

12.07.2009

Merry Petals Matchbox


These matchboxes are perfect for making cute quick gifts for friends and family. I used the Petals-a-Plenty textured impressions folder to add some texture to the top of the box as well as to wrap around the chocolate. I used the trees from the Merry Details Sizzlit to decorate the Merry tag I made with Merry Embosslit all of which are from the Holiday Mini Catalog that ends Jan 4th!

Cardstock Colors: Real Red, Certainly Celery, Brocade Blue, Soft Suede

Don't forget to get your holiday orders in before Dec 15th to insure delivery by December 24th! Click here to order now!


12.04.2009

Christmas Cocoa Packet Pocket Card

Check out who's hiding inside this adorable card!


It's a cute little Gingerbread man with a gift inside!

Mmm, hot chocolate! My friend Donna put together this project for us to make at our last demonstrator meeting. She had already cut a 10-1/2" x 12" piece of real red card stock and scored at 2-3/4" from the left and right side on the 10-1/2" side and 2" on the 12" side.

Then we scored at 5" to the 2-3/4" score line (leaving the center portion of the cardstock unscored) and resumed scoring at the 2-3/4" score line to the bottom. Then we scored one more time at 7"

We then cut at the 2-3/4 vertical score line to the 2" horizontal score line and cut off the piece and repeated this on the other side.

Then we cut on the other side at the 5" horizontal line to the 2-3/4 score line to cut of the 2-3/4" x 7" piece on both sides so you have a "t"

We attached the bottom flap with sticky strip on the sides to create the pocket and then decorated the card with pieces of designer series paper.

This is such a fun project that anyone would enjoy as a gift!


11.20.2009

Snowflake Gift Card Box


At my stamp club last night, we this cute little snowflake box with three cards and envelopes to go inside. We started by making our own stencil with a 3x3 piece of a window sheet and the ornament punch. Then we swirled some bash blue ink with a sponge dauber onto the card using the ornament stencils we created. Then we stamped the medium snowflake from the Serene Snowflakes stamp set in silver with the stencil still in place.

Then we layered it on some bashful blue cardstock and punched a 1/16th circle in the top of the ornament and tied some silver elastic cord into a bow on the ornament. We used dimensionals to place it on a 3x6 piece of night of navy folded in half.

We stamped the greetings from Christmas Greeting inside the cards.

For the box we started with a 3-1/2" x 8'1/2" piece of Night of Navy and stamped the large and small snowflakes from the Serene Snowflakes stamp set all over the box. The box was scored and 3/4" across the bottom and at 3 -1/4", 4", 7-1/4", 8" lengthwise. Then the right hand corner was cut away and the bottom score lines were cut up to the 3/4" score line. We put it together with some sticky strip on the right 1/2" panel and then some on one of the bottom panels.


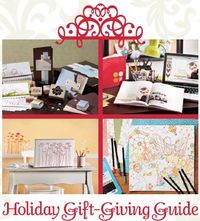
Don't forget to check out the Holiday Gift Giving Guide! When you purchase $50 of merchandise from the guide, you'll receive a free (up to a $16.95 value) decor element!


Here is a video tutorial I created on how to make your own stencil and some different ornament cards and tags:


11.02.2009

Stampin' Up! Holiday Gift Giving Promotion

Holiday gift giving guide

Promotion Period: November 1, 2009 - January 4, 2010

Make Stampin' Up! your one-stop shop for all your holiday gift-giving needs. With this Gift-Giving Guide (click to open) you can quickly and easily find gifts for kids, teens, neighbors, and more!

PLUS, for every $50 you spend on products in the Gift-Giving Guide, you can choose a FREE Décor Element (valued up to $16.95).

6.02.2009

Treat Bag

I love making treat bags and when I saw one on the cover of the Stampin' Success Magazine, I decided to try to make one of my own!  I started with a 4" x 12" sheet of pacific point cardstock and scored it at 5 1/4" and 6 3/4" lengthwise for a 1 1/2" base.

For the little box inside, I used a 2" x 10" piece of so saffron and scored it lengthwise at 1 1/2",  4 3/4", 6 1/4" and 9 1/2" which leaves a 1/2" tab to put it together.

I used a 4" x 2" pice of textured kiwi kiss and scalloped the edge.  Then I wrapped some of the so saffron poly twill around the bag and added a top note cut out of Good Morning Sunshine with two holes punched in the top to pull the ribbon through and tie.  I added some textured chocolate chip cardstock as "buttons" to add some interest to the front of the bag.

Don't miss out on all your favorite retiring stamps, papers, decor elements and accessories! Click on the lists on the right sidebar to see what is retiring at the end of this month!  Then click on my Order Online button to get your Last Chance items today!  There are already over 10 items that are gone, so don't delay!


11.18.2008

Hot Pepper Jelly


I love hot pepper jelly! I found a great recipe for it and made a whole bunch, so I put some in baby food jars and dressed them up with some Holiday Treasures DSP and a little snowflake stamp from Snow Swirled on top with the label and the present stamp from Deer Friends. It makes a great holiday gift, so save those baby food jars!
Edited to add:
I've had some requests for the recipe so here it is:
Holiday Pepper Jelly

8 cups sugar, divided
2 jalapeño peppers, seeded
1 green bell pepper, seeded
1 red bell pepper, seeded
2 cups apple-cider vinegar
1 box (6oz) liquid pectin (2 pouches)

In a food processor, combine 1 cup of the sugar and the jalapeño peppers. Process until the jalapeno peppers are completely ground. Sugar will look green. Transfer to a large saucepan.

Cut green and red bell peppers into chunks. Chops pepper chunks into small piece in food processor. Add peppers, vinegar, and remaining sugar to saucepan and bring to a boil.

Add both pouches of pectin, and boil 1 minute. (Don’t leave or it will boil over!)

Skim foam from surface. Let cool for 1 hour. Stir, and then transfer to clean jars and cover. Refrigerate up to 6 months. Makes 9 cups.

Enjoy!