 I still can't get enough of this cute little owl! I used the Woodgrain background on Crumb Cake and layered it on some Early Espresso. Then I punched the whole for the owl to peek through and added a scallop circle around it. I added my little owl friend and an expression from Teeny Tiny Wishes.

3.31.2011
Still lovin' the Owl
I still can't get enough of this cute little owl! I used the Woodgrain background on Crumb Cake and layered it on some Early Espresso. Then I punched the whole for the owl to peek through and added a scallop circle around it. I added my little owl friend and an expression from Teeny Tiny Wishes.

3.29.2011
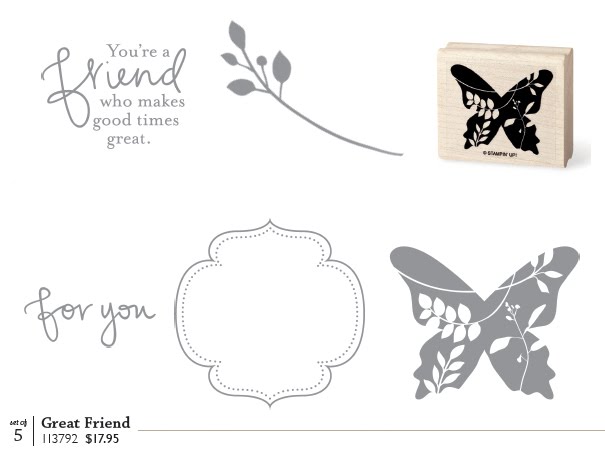
Butterfly Pansies Card

I decided to try making some pansies with the butterfly punch. I discovered that there are several ways of making them. I decided to go with using the sponge dauber for the color and cutting some of the butterflies to make the petals. They are really fun to make! I decided to use a texture plate on the top note die and add the sentiment from Great Friend.
3.24.2011
Scalloped Card Box Tutorial
 I created this Scalloped Card box for my stamp club this month. It is the same as the one that I made here for my friend Lisa.
I used the Baby Blossoms stamp set for the cards in baja breeze and pear pizzazz. I added a strip of Springtime Vintage Designer Paper layered with not quite navy and used the scallop trim border punch on one edge to the box. I made the flower with the Fun Flowers die from the Occasions Mini Catalog. I ran them through the perfect polka dot and vintage wallpaper embossing folders. I used the 5-petal punch to create the leaves.
Here is a video tutorial I made to show you exactly how:
Here is a list of the supplies that I used! Place an order and you will receive a free surprise gift from me!
Click here to Order Stampin' Up! Online Anytime!!
3.22.2011
Ice Cream Parlor Scallop Envelope Tote

Are you having as much fun with products from the Sale-a-bration catalog as I am? Here is a quick little tote I made with the Ice Cream Parlor Designer Series Paper pack from the Sale-a-bration catalog. I used the Scallop Envelope die to cut out two envelopes and used a 1" x 8-1/2" strip of Tangerine Tango as the handle. I added some of the Ice Cream Parlor ribbon around the flaps and a sentiment from the Great Friends stamp set.
Only 9 days left to Sale-a-brate!
3.17.2011
Chocolate Take Out Box

This is a take out box made with the petal cone die! I saw this on Dawn's blog and decided to make one right away! I cut two petal cones dies and then lined up the score line with the 2" line and scored and then lined it up with the 3" line and cut. I trimmed away the bottom half of the tab and then cut along the score line up to the first score line that I made.
I tied some chocolate chip satin ribbon around the box and added the sentiment from the Eat Chocolate stamp set. What a fun little box to put some chocolate in and give to a friend!

3.15.2011
Owl Peek-a-boo Card

This is such a fun card to make! I was inspired by this card by Peg. I started with a 6-1/2" x 6-1/2" card and folded it in half. I measured the find the middle of the card and started punching from there. I added some scallop circles by first punching a 1-3/8" circle and then lining the circle up in the scallop circle punch and punching it out.
I used the Sale-a-bration Punch Bunch stamp set. Here is what the card looks like inside:


3.11.2011
Bring on the Cake Birthday Cards
 Need a birthday card in a jiffy? I saw this project by Iliana and thought it was a great idea to make some quick 3x3 cards ahead of time and store them in a cute box created with the Scallop Envelope Sizzix die. I used a strip of the Celebrations Designer Series paper and added a sentiment from the Bring on the Cake stamp set. Quick, cute, easy and ready to go!

3.10.2011
Build a Blossom Birthday Card

I love stamp sets that have coordinating punches like the Build a Blossom stamp set and the Blossoms Petal Punch. I can create beautiful dimensional flowers in just minutes. I saw this card by Connie and had to make one of my own! I used the Springtime Vintage Designer Series Paper and layered it on some old olive. I wrapped some very vanilla satin ribbon around and added a sentiment from the Bring on the Cake stamp set and layered it on the designer label punch.


3.09.2011
Bliss Card

Bliss is one of my favorite sale-a-bration stamp sets ever! I love the beautiful swirls and butterfly. I used the Framed Tulips embossing folder and then embossed the swirls and added the butterfly on top. I used a rosette with some marina mist taffeta ribbon.
Only 28 days left of sale-a-bration! Don't miss out on the best sale of the year!

3.08.2011
Create a Cupcake Birthday Card
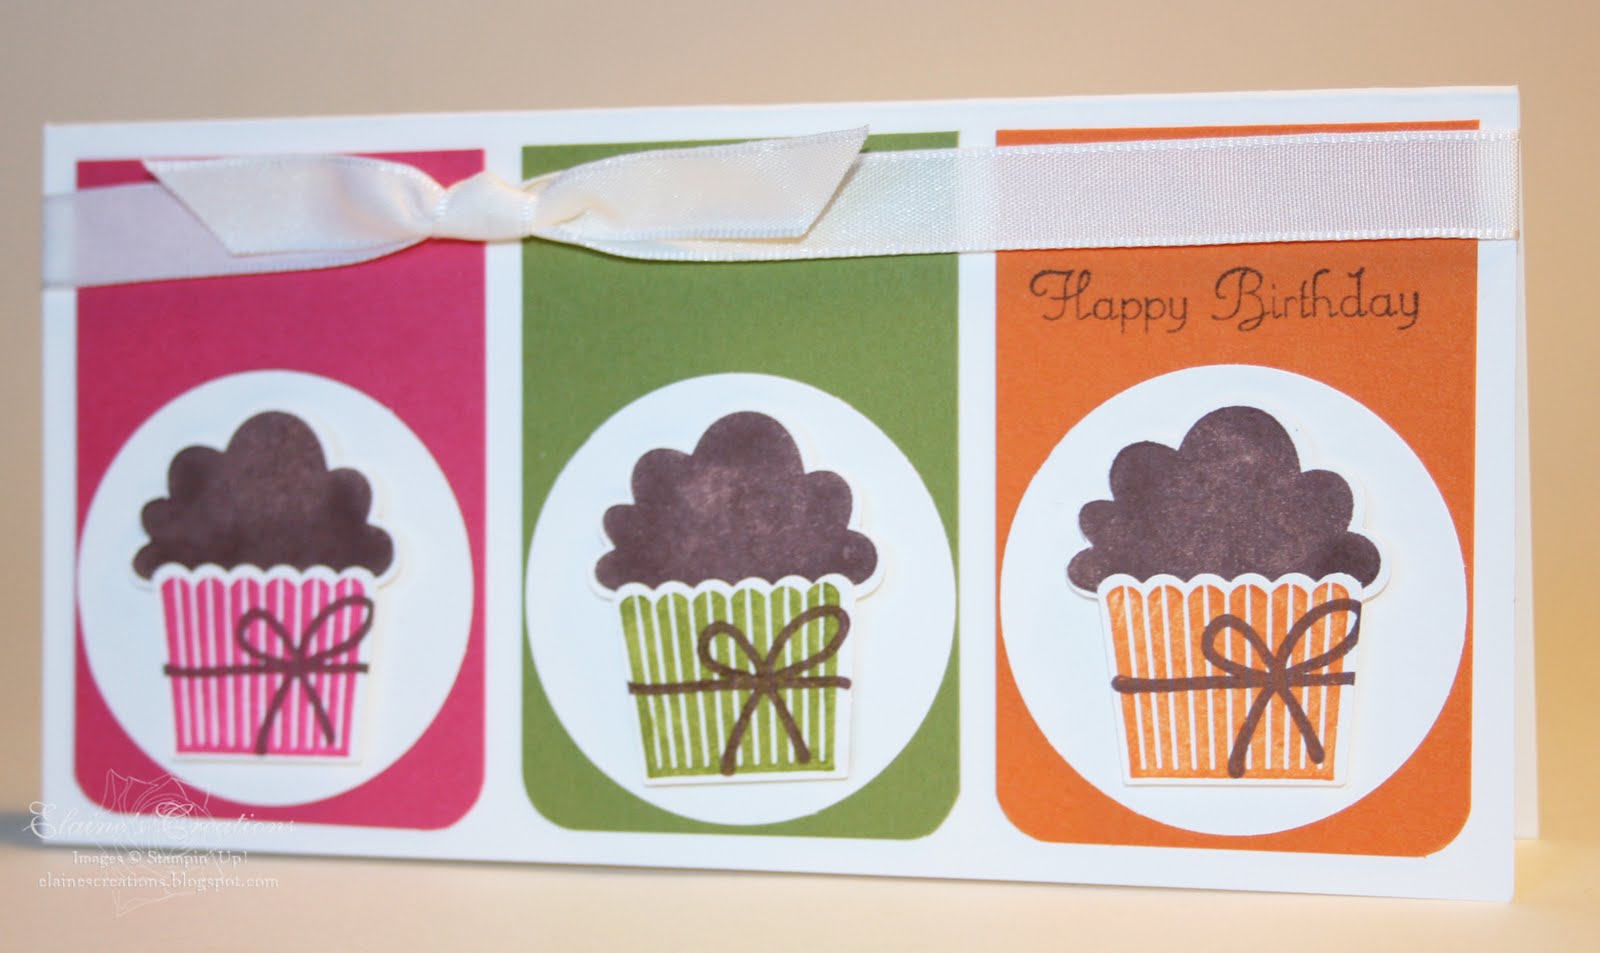 Isn't this a cute card? I saw this card by Mary and thought so too! I used the new Create a Cupcake stamp set and coordinating Build a Cupcake punch to make this colorful birthday card. I used a 6x6 card folded in half that fits perfectly in the Small Open End Envelope. I stamped the chocolate frosting and then punched it out and then stamped the cupcake holders in Melon Mambo, Old Olive and Tangerine Tango and punched them out. I stamped the bow after I punched the cupcake holders out. I used dimensionals to put them on the circles and then placed them each on their coordinating color! What a fun birthday card!

3.07.2011
Monogramed Cards in Scalloped Card Box
 I made these Monogramed cards and the card box to hold them as a gift for a friend. I love making monogramed cards as gifts, because people love to receive and use them! I decided to go with an elegant design and what could be more elegant than the Manhattan Flower embossing folder and the Fifth Avenue Floral stamp set? The Lovely Letters Alphabet coordinates so perfectly with this elegant group.
For the card box, I came up with my own pattern. I started with an 8-1/2" x 11" piece of Very Vanilla cardstock and scored at 3", 4", and 10" on the 11" side and at 1", 2", 6-1/2" and 7-1/2" on the 8-1/2" side. I cut away the corners as shown above and then added sticky strip as shown below. I scalloped the edge that folds over the box and put the box together.

3.04.2011
Eat Chocolate Card

Need some embossing wow? Try double embossing! First I used the Square Lattice Embossing folder followed by the Framed Tulips embossing folder to achieve the double embossing effect. I was inspired by Robin's card here. I used the new Eat Chocolate stamp set from the Occasions Mini Catalog. I wrapped the stain ribbon around the card like a chocolate box.
Now all it needs is some chocolate to go with it!

3.03.2011
Clearly For You
 The new Clearly For You stamp set is perfect for using the new Beveled Windowpanes, both from the Ocassions Mini Catalog. I was inspired by Ilaina's card here. I started with a Cherry Cobbler base and used the Framed Tulips embossing folder with Crumb Cake cardstock. I used some of the coordinating Botanical Gazette Designer Series paper and Cherry Cobbler seam binding as well. The Beveled Windowpanes come in several different sizes for you to try!
3.02.2011
Build a Blossom with Envelope Gift Box
 I love, love, love the new Build a Blossom stamp set and its coordinating punch, Blossom Petals!! This combo makes it so easy to create beautiful flowers! I decided to use the new In Color, Blushing Bride, for the petals. I used the new Framed Tulips embossing folder to create a square frame and added a marina mist scalloped oval for a little punch of color.
I also made this cute coordinating envelope gift box using this tutorial. This box is great for holding cards with a little extra bulk. I layered the scallop punches with a flower on top.


3.01.2011
Easter Blossoms Silhouette

I just love how the Springtime Vintage fabric coordinates with the Springtime Vintage Designer Series Paper! I cased this card by Melissa. I used the new Fun Flowers Bigz L Die from the Occasions Mini Catalog to create the flower and added a Antique brad in the center. I used the Ovals Sizzix die to stamp the silhouette of the girl and then added an oval piece of vellum over it to soften the silhouette. I used the new Framed Tulips embossing folder and added some Crochet trim to finish the card.

Click here to shop now!

Click here to shop now!
Subscribe to:
Posts (Atom)